Little Witches and Tiny Houses

Hello, it’s been awhile since my last post! I’m in a Halloween crafting mood and decided to make a little scene using some of the smaller Julie Nutting dolls (Witchy Poo, Merry Nice & Warm Wishes) with the Tim Holtz Tiny Houses Bigz die.  Two of my houses are shakers and if I want to shake them, I can turn this whole thing upside down and do so!


I cut a 12×12 piece of paper in half, then folded on each side to create a box lid that’s 11×5.

To make the fence, I used the TH Gothic Gate thinlit die and added Prima Art Alchemy Metallique Wax (Brushed Iron) here and there.

The paper I used for my tiny houses is Amber Moon by Frank Garcia (Prima).  It’s such gorgeous paper!

Rather than go into a lengthy explanation of everything, I’m going to post pictures instead.  Please feel free to leave a comment or email me with any questions.  Thanks for stopping by!


Playing along with the following challenges:

http://www.vintagejourney.com/2019/09/box-it-up-vintage-journey-september.html


Jolly St. Nick in his PJ’s

Hello there! This past week or so I’ve been playing around with the new Tim Holtz die set, Jolly St. Nick. He is just adorable! I made two St. Nick’s, one in his traditional red suit, and one in PJ’s. PJ Santa got up during the night to get some hot cocoa, and is checking out the weather as he passes by the window. If that snow keeps up, he’s going to need Rudolph to lead his sleigh.

My project started as a card, but after adding an arm to Santa on the left side to hold his candle (Frightful Things die set), it needed to be bigger than the 6×6 below, so I decided to make a home décor piece instead.

After I was done with Santa, I started on the window (BIGZ Window Frame), first embossing my white paper with the Lumber 3-D Texture Fades embossing folder. After cutting it out, I colored with Vintage Photo and Walnut Stain Dox Sprays, and used Distress crayons in between layers: Picket Fence, Black Soot and Walnut Stain. I wanted the window to look old and worn, like the “wallpaper” behind him.

My snowy window frame was made by blending Black Soot DOX and Chipped Sapphire DI. Next, I used white acrylic spray paint, then white gesso, to create the snow. After that I used Wow Ultra High Opaque Bright White embossing powder, and the last step was adding Ranger Frosted Crystal Antiquities embossing powder. The little candles are from the Festive Things die set.

I picked up a frame at the Dollar Store and it wasn’t bad looking, but I didn’t care for the brassy color for my project. I applied numerous layers of Prima Art Alchemy Metallique waxes: Brushed Iron, Rich Copper and White Gold. On the corners, I added Distress Glitter Dust (Vintage Platinum). On the two corners, I used Festive Greens and Holiday Greens (Mini), blinging it up a bit with Christmas Red Stickles.

I inked a Christmas Quote Chip with Vintage Photo DOX and splattered with white acrylic spray. Santa really loves a White Christmas.

All of the papers used were from my stash. To make the “wallpaper” look worn, I sanded it and inked with Vintage Photo DOX. Santa’s hair and beard were inked with Hickory Smoke DI. His jammies were inked with Aged Mahogany DI and I outlined the various pieces a bit with my Pitt Big Brush Artist pen (Nougat).

Thanks for stopping by for a look. Here’s a few more pics of Santa because I can’t resist that cute face!

Playing along with:

http://jinglebellesrock.blogspot.com/2019/07/a-rustic-glam-christmas-fireside.html


Octopus’s Garden Birthday Card

Hello! It’s been awhile since my last post – busy, busy year. My Sis had a birthday this month and this is the card I made for her. I was inspired by the movie, “Yesterday” about the Beatles’ music. The song wasn’t performed, but was mentioned. I heard it on the radio after leaving the theater and couldn’t get it out of my head. I did have to alter the lyrics to make it fit for my card, LOL.

Unless indicated otherwise, all products are Tim Holtz.

To create my background, I blended Tumbled Glass DI, Broken China & Chipped Sapphire DOX, spritzed water and Cracked Pistachio DOX spray over the lighter colors. I also inked the edges with Vintage Photo DOX. I sprayed sea foliage stamps from the Sea Life set with water, then re-stamped in (Wendy Vecchi) Watering Can Archival ink. I decided to add texture by using the 3-D embossing folder (Elegant). The flourishes made me think of waves in this situation.

I made the octopus next, stamping in black Archival ink and coloring with Wilted Violet and Chipped Sapphire DOX. I used Gloss White Nuvo drops for the eyes and added a little shine along the edges with Prima Metallique Wax in White Gold. I had to add a bow (Crazy Things stamp set) since the Octopus in my card is a girl. The bow is colored with Abandoned Coral DI and DOX with a little bit of Fruit Punch Stickles in the middle.

For the garden, I used the Core’dinations pads I had on hand with Funky Florals 1 & 2.

I printed the sentiment and used the Labels die set to cut it out on white paper, adding some Antique Linen and Vintage Photo DOX. I finished it off with sequins, Seth Apter Baked Textures (Dirty Sand), and Prima mini art stones.

That’s it, thanks for stopping by for a look!

Playing along with:

https://www.simonsaysstampblog.com/mondaychallenge/

http://diesruschallenge.blogspot.com/2019/07/challenge-125-birthday.html

http://countryviewchallenges.blogspot.com/2019/07/july-2019-blues-greens.html

https://justforfunrubberstamps.blogspot.com/2019/07/jff-july-2019-challenge-at-shoreline.html


Springtime Bunny Tag Book

Hello! At the end of last year, I decided to take a little break from my blog, but it extended longer than I had intended. My son broke his ankle mid-February and since then, he’s been back at home recuperating. Although I haven’t blogged, I’ve managed to get a few things posted on FB.

This is the front page of my most recent project:

The rest of the pages…

The challenge theme on Prima/Julie Nutting’s FB page this month is Spring and I decided to make a tag album using Julie’s Bunny stamps and dies set. My tags are a combination of the G45 Square Tag & Clock die set, and Spellbinders Opulent Ovals. Patterned papers are from the Prima/JN March and April A4 paper pad. The little farmer bunny’s background was made using the carrot and lettuce stamps (from the Bunny set) on green gingham paper from the March/April pad.

Other products used:

Distress Inks: Vintage Photo, Dried Marigold, Carved Pumpkin, Ripe Persimmon (carrots); Mowed Lawn (lettuce)

Distress Oxide Sprays: Faded Jeans, Cracked Pistachio, Iced Spruce (Farmer Bunny outfit); Spiced Marmalade & Fossilized Amber (large Peony flower)

Prima Art Philosopy Pan Watercolor – Complexion (all 3 Bunny dolls)

Memory Box dies: Delightful Peony Outline & Background

Tim Holtz dies: Mixed Media set 660220; Funky Florals 1 & 2

Tim Holtz 3-D embossing folder: Botanical

Tim Holtz Jute String

Prima Art Alchemy Metallique Wax: White Gold

Nuvo Drops: Gloss White, Ripened Pumpkin

Minnie Pearls (mini) Prills

Prima Tea Rose (Santa Rosa)

Thanks for stopping by and have a great day!


Christmas Joy

Hello, just a quick post with a Christmas card.  I haven’t played with Julie Nutting’s Christmas doll stamps enough this season and I’m hoping I have time to make more.

Joy1
I love the Joy doll stamp – she’s a good size and easy to work with.  I decided she needed a companion, so I added Max, the dog.  Isn’t he adorable, and don’t they both look nice in their Tim Holtz paper clothing?  I do love combining my JN and TH products.

Not too much to talk about here – I used 2 of the TH paper pads – Yuletide and Noel, for background and outfits, which have some subtle splashes of watered-down gesso.  The doll’s hair and skin were colored with JN’s watercolor pencils for hair and skin.  I made Joy’s hair bow with the mistletoe stamp from the set, and colored it with Kuretake gold metallic watercolor paint.

Joy close-up

I colored Max with Antique Linen and Vintage Photo DOX.   He reminds me of our sweet Cairn Terrier, Brody, that crossed over the Rainbow Bridge nearly 2 years ago.

Joy Dog

The sentiment background was the same as Max but with Black Soot DOX added, and was cut out with TH Stacked Baroque die set.  

Joy Sentiment

I used Finnabair’s  beautiful”Wild Berries” stencil with Bo Bunny Gold Glitter paste – it just adds something to the background.

Joy Background

I made 2 sets of mistletoe – one embossed with gold and one embossed with silver.  They were each colored with the opposite color using Kuretake metallic watercolor paints, but they didn’t show up enough because of the background, so I  colored over them with Mowed Lawn DI and they turned out nice and shimmery.  I used the one with the gold embossing which has Christmas Red Stickles berries.

Joy Mistletoe

To finish up, I used some ribbon and sequins from my stash.  I do believe that covers everything.  Thanks for stopping by and Happy Holidays!

Joy2

Linking up to:

https://www.simonsaysstampblog.com/blog/christmas-card-day-want-100-gift-card-us-2/

Snowy Victorian Carolers

Hello!  I hope everyone had a nice Thanksgiving and before we know it, Christmas will be here.  Last year I cut out a set of Tim Holtz Victorian Carolers and Lamp Post (both Bigz dies) but didn’t get around to doing anything with them.  I got them back out and since we’ve already had snow several times this month, I made a snowy scene.  With the exception of a few items, all products used were by Tim Holtz.

carolers2

After cutting the figures out, I edged each with a little bit of Prima Metallique White Gold wax to give them a little “glow”, and used Core’dinations Classis Collection paper for the lamp post light, with acrylic added on top.  I gave the holly and berries a bath in clear Wink of Stella, which is nice and sparkly in person.  I splattered these pieces first with Dylusions White Linen ink spray, then with watered-down gesso.

carolers5


I wanted to make a shaker card and chose the musical notes paper from the Yuletide paper stash and used Spellbinders Nestabilities Radiant Rectangles for the shaker background.  I added some Dept. 56 plastic snow and a snowy sequin mix.  With the intricate design of the rectangle die cuts, I wasn’t able to add dimensional tape, so my shaker doesn’t shake very much, but I like how some of the snow and sequins stay up near the top even when it’s standing upright.  The acetate was splattered in the same manner as the carolers and lamp post.

carolers3

The paper below the shaker is the reverse side of the musical notes paper, and directly below that is paper from the Noel/Navidad paper stash.  These pieces were spritzed with water and I worked the edges to make them worn looking before drying.  All paper was inked with Vintage Photo DOX, but the green layer also has some of the white gold wax and some clear & white embossing powder mixed with Clear Rock Candy glitter.

I added some crinkle ribbon with a small amount of Vintage Photo Dox, embroidery floss, a “Festive” token and snowflake. “Festive” was colored with white distress crayon and some Mushroom alcohol ink was dabbed on.  The barely visible snowflake was embossed with the same embossing powder mixture mentioned above.

carolers15 

I think that covers it and I hope you’ve been inspired to make a snowy shaker scene, too.   Here’s a few more pics:

carolers8

carolers13

I’m linking up to the following challenges:

https://www.simonsaysstampblog.com/wednesdaychallenge/
https://www.simonsaysstampblog.com/blog/work-wednesday-november-2018-ho-ho-holiday/

Merry ChristMoose

Hello!  The year is flying by and I’m watching Hallmark Christmas movies again – the perfect ambiance for making Christmas cards!  The majority of products on this project are from Tim Holtz.

One of my favorite new dies this season is the Merry Moose.  It’s just too cute!  

mm5

For my backgrounds, I used the 3-D Lumber EF and most of the brown distress colors splattered with white acrylic paint and gesso, and added Clear Rock Candy glitter (combined with clear EP, 1 part glitter, 2 parts clear EP).  I did end up adding white EP to the mix and embossing again for a snowier look.  For the other background,  I used the plaid background stamp with Fired Brick, Walnut Stain and Vintage Photo DOX.  I thought it needed something else so I added a piece of paper from one of Tim’s Christmas pads as the bottom layer.

The moose is cut from plain white cardstock and edged with Hickory Smoke DI and embossed with the glitter/clear EP mix.  Up close, he looks a little dirty like he’s been romping around through the forest.  The collar, antlers and trees are cut from a combination of Core-dinations colored and metallic cardstock, then I added the Clear Rock Candy glitter/EP. (I later added the snowy mix to his antlers). 

mm9

 I made the brown trees first and inked them with Walnut Stain and Vintage Photo DOX, but the details ended up being hidden under the snow and frost I added.  Those trees blended into the background too much, so I made white trees and after assembling, I decided to inlay the white trees into the lumber background. Of course, it’s much easier if you inlay them before adding the branches, but I still made it work.  To add dimension to the brown trees, I glued the cut-outs from the lumber background behind, but not perfectly.  When I colored my white trees, I smooshed the embossed areas onto my little Hickory Smoke DI pad, then again using the Black Soot DI pad before added my snowy EP mix.  The Snowcap stencil was used for the snow banks and inked with Hickory Smoke DI and embossed.

mm3

I wrapped some white paper string (Solids, Paper String) near the top of the lumber background before adhering to the plaid.  I tied some bakery twine near the left edge and added a Tiny Bell.  I added “Merry” from the Shadow Script Christmas set, and “Christmoose” is from the 1″ Tall Alphanumeric set.  The stars are from the Swirling Stars set.

mm4

I think I’ve covered everything, but please ask questions if I’ve missed something.  Thanks for looking and have a great day!

mm8

Linking up to:

https://www.simonsaysstampblog.com/mondaychallenge/
https://www.simonsaysstampblog.com/wednesdaychallenge/


Catgirl Halloween

Hello!  The month of October is flying by but I wanted to make another Halloween card using one of my Julie Nutting doll stamps.  This really looks so much better in person and I couldn’t get the true shades of color to carry over in the photos  no matter what I tried.  For instance, Catgirl’s hair is darker in person, about the same shade as the purple in her dress.catgirl1

I started with my background, using the Prima Flourish stencil again.  I used purple cardstock and inked it with Wilted Violet DOX, dried, then sprayed with Wilted Violet Distress spray for a tone-on-tone finish.  I stamped the edges with Bo Bunny Essential Stitches clear stamps, but wish I hadn’t.

catgirl5

My orange layer is from the G45 Steampunk Spells collection.  The green background, Catgirl’s outfit and the cat were cut from some gel prints I made last year – my very first ones.  They’re awful but I saved them thinking I could use portions of them for something.  On the green background, I used the text stamp from the TH Entomology stamp set and embossed in white.  I added a moon and then covered the background with TH Tangled Twigs, partially embossed with Seth Apter’s Rocky Road baked texture.

catgirl3

I colored Catgirl’s hair with the purple color from Prima’s Tropical Watercolor confections and added white gel pen.  I added white gel pen to her outfit and as well and splattered with white acrylic spray.  I added Stickles to her cat ears, and to the cat’s facial features and collar.

catgirl2


catgirl4

The word “boo” is from TH Vintage Spirts die set and was cut out using silver glittered foam.  This was placed on top of Prima’s Forest Leaves.  “To You” is from the TH Halloween Words die set.  I embossed around the edges of the purple layer with silver glitter and clear embossing powder.  My bow was from my stash, a green ribbon that I added Twisted Citron DOX to so that it would match my green background.  I added a little bat from a previous project and placed black bling on top.

Thanks for stopping by and have a great day!

I’m linking this up to:

https://www.simonsaysstampblog.com/mondaychallenge/
https://www.simonsaysstampblog.com/wednesdaychallenge/


Pink is ALWAYS a Good Idea

Hello!  I’ve been wanting to play with my Ava stamp and die set – one of the generous prizes sent to me by Prima Marketing for the Mermaid Challenge.  Thank you Prima Marketing and Julie Nutting!! 

ava10

 I used my set of JN Watercolor Pencils, Hair & Skin Tones, for Ava’s skin.  To color her hair, I used Prima Watercolor Confections (Tropicals), color 22.  I watered it down quite a bit and added more color until I was happy with the results.  I used Tim Holtz Seedless Preserves DI for her “highlights.”  Ava might be a classic glamour girl, but she still likes to play around with trends.

ava6

Ava’s dress and headband were made using the Glitter Lace technique (it’s not a background stamp or stencil) shown here, with Crystal Fine and Onyx glitters from the Martha Stewart Essential Colors glitter set – love the sparkle, which doesn’t show up in most of the pics.  Her shoes were colored with a black Archival ink pen and covered with Glossy Accents.

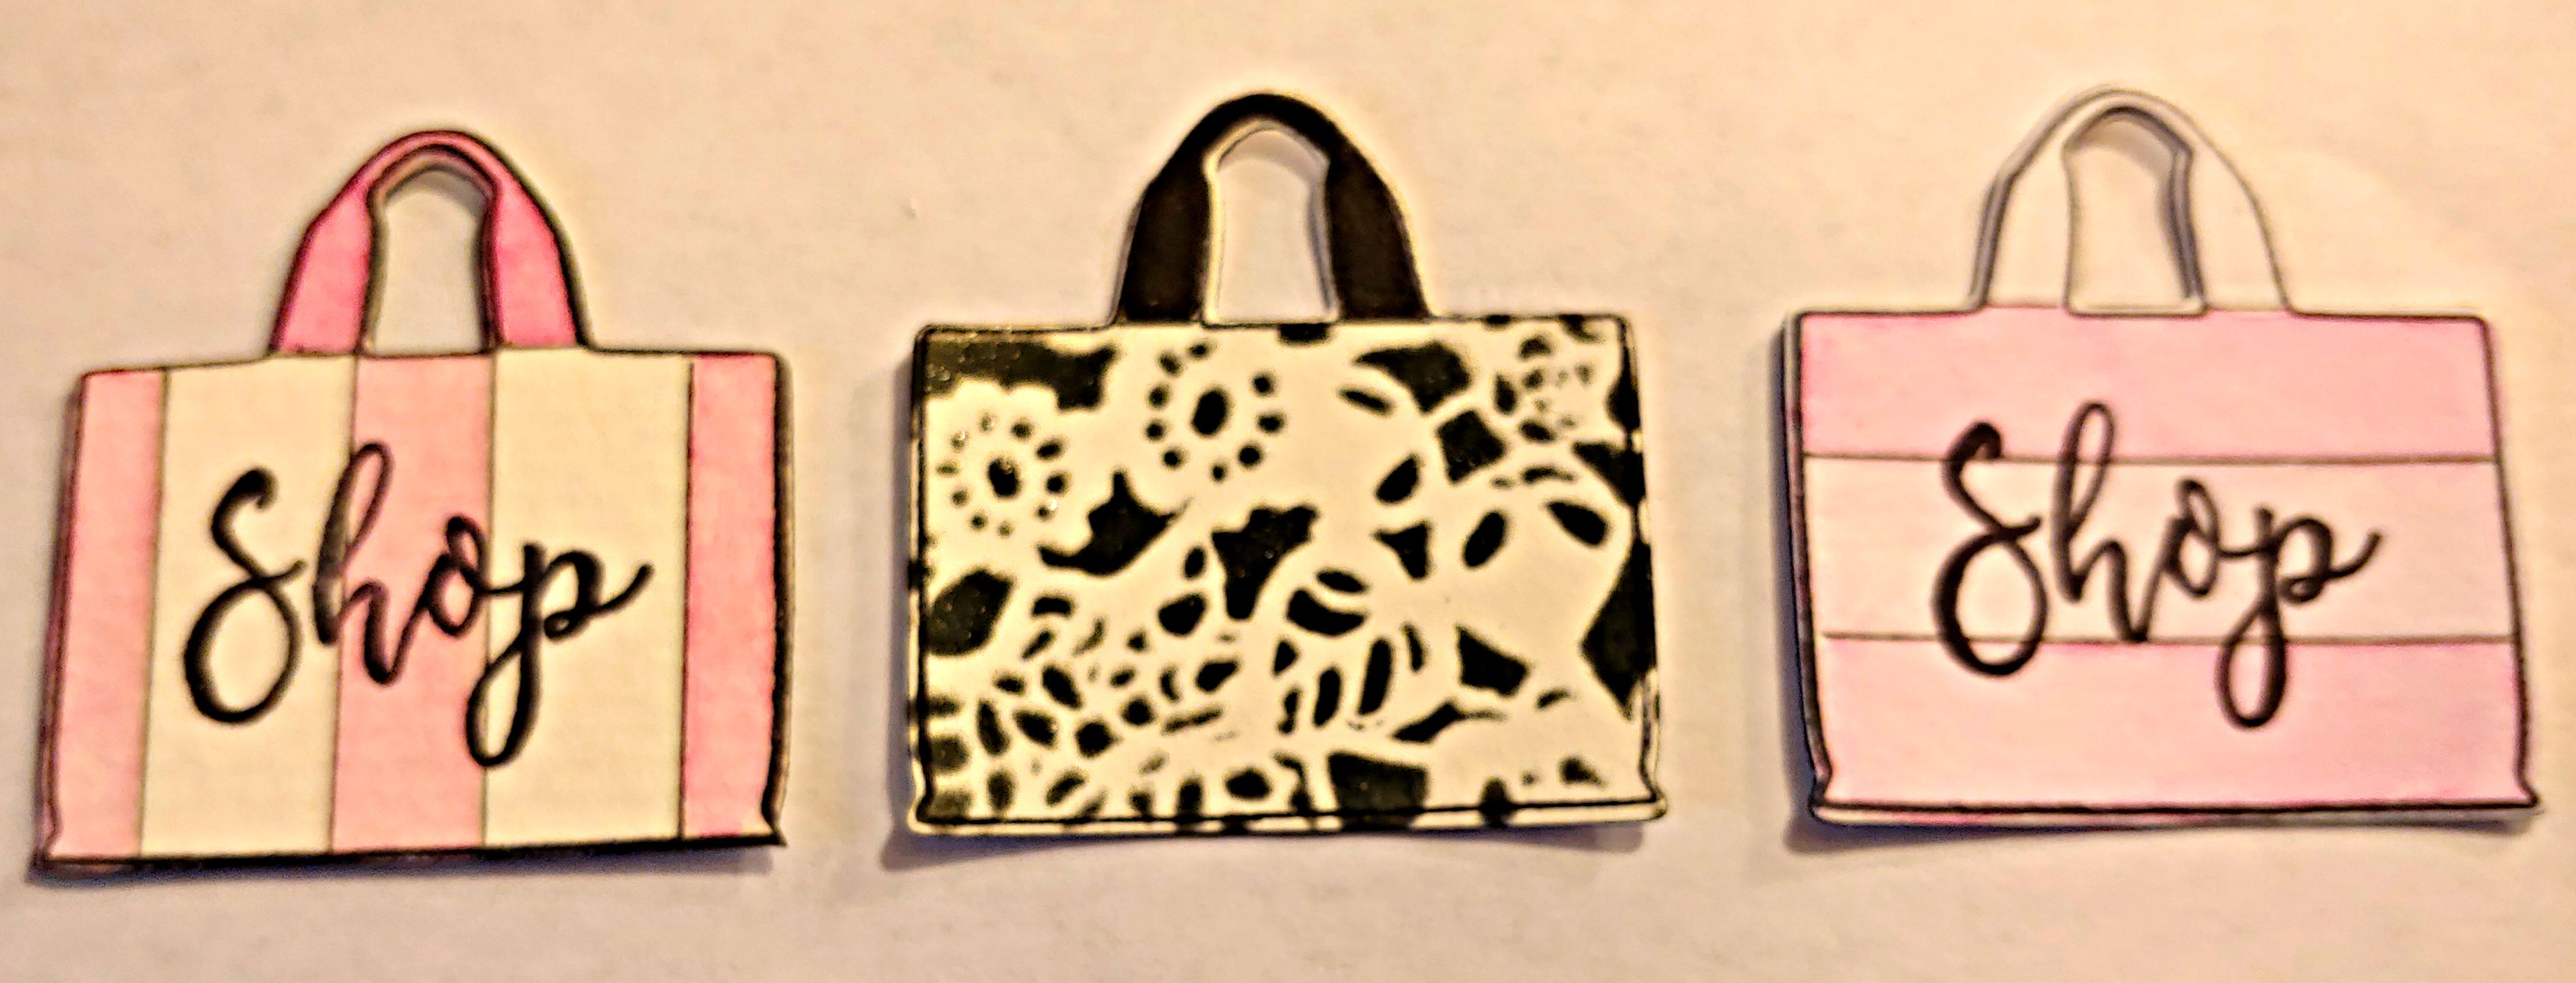
Of course, Ava’s been busy shopping!  I made 3 bags for her, the striped ones were made using one of the new TH Shifter Stencils – Stripes, and I made one vertical and one horizontal.  I used the TH Doily stencil for the black bag.  I ended up doing a pale pink color wash on that one and wish I had left it white, as shown below.  All handles were covered with Glossy Accents.  Please excuse the poor quality of the pic, but I was just taking quick pics in my room while working.

ava2

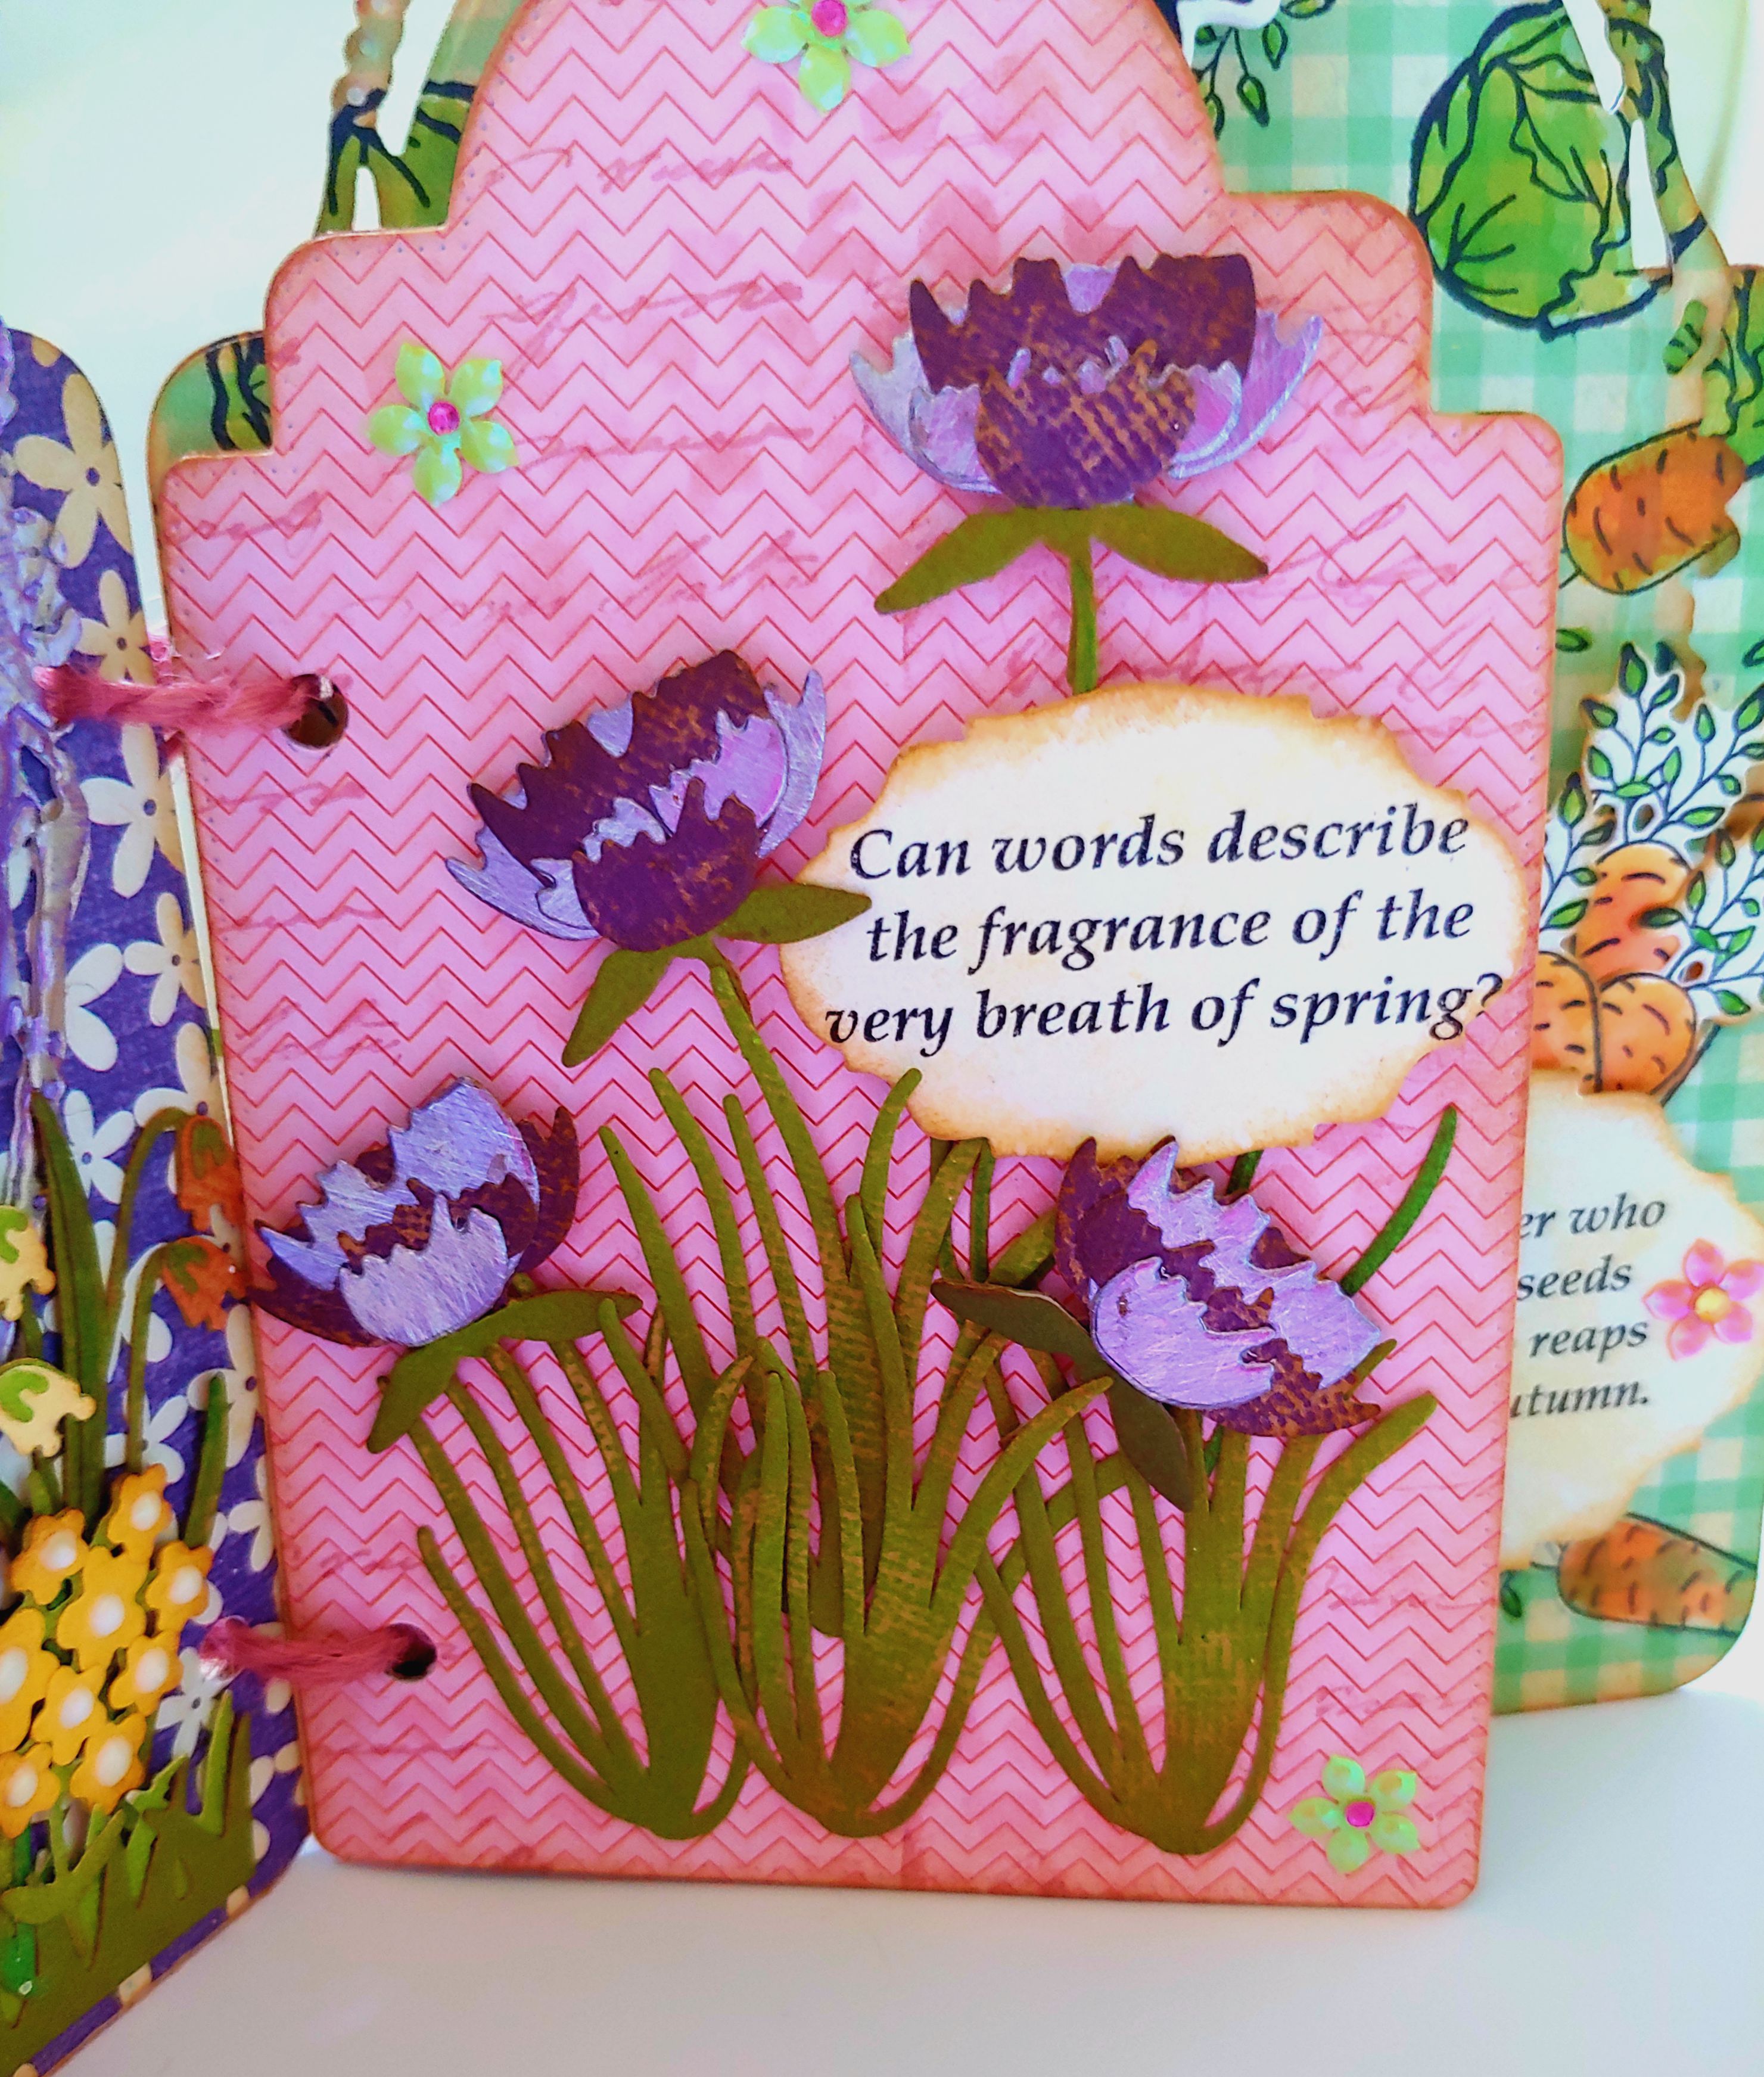
The flowers were made from the Heartfelt Creations Small Carnation Die (and stamp for the leaves).  I made 3 backgrounds using TH Picked Raspberry DOX and color 22 from the confections set, each having less intensity, and combined those to put the flowers together. I also used the Heartfelt Basic 3-D Shaping Mold.  The leaves are just from gray cardstock, stamped with Archival Ink Watering Can and inked along the edges with Hickory Smoke DI.  I added Prima Mini Art Stones and there’s a little bit of glitter on there.

ava11

My background and technique is similar to the one I made here, minus the marbling.  Another difference is that I used white embossing paste, sprayed with TH Distress Resist spray, then sprinkled on silver embossing powder, trying not to have complete coverage with either the resist spray or EP.  Once dry, I heat embossed and this is how it looked:

ava3

I wasn’t sure what color to use for the background, it couldn’t be pink…I decided to use TH Seedless Preserves DOX for a wash of my resist background (made on 110 lb. cardstock).  To tone it down a bit after drying, I sprayed it with TH Hickory Smoke Distress spray.  I added a little more than I had intended and it soaked right in, there was really no wiping any off (I tried).  It gave my background a mottled look which I wasn’t going for, but it has grown on me.  I inked the edges with TH Black Soot DOX.

ava4

I used the sentiment from the stamp set because it’s so perfect and was the basis for my design.  I watered down the Prima color 22 to give that white background a little bit of color.  I added a sequin, colored my ribbon with the Hickory Smoke spray, and then I was done!

Here’s another pic taken under different lighting that shows some of the sparkle.

ava15

Thanks for stopping by and have a great day!

Linking up to:

http://www.fashionablestampingchallenges.com/2018/09/10/challenge-134-animals-2-2-2-2-2/

Halloween Tag Book

Hello, thoughts and prayers go out to those affected by Hurricane Florence…

Recently my sister visited and we decided to make a Halloween Tag booklet similar to one on display at the local scrapbook store.  Hers turned out great but I wasn’t happy with mine and decided to skip the pockets, etc., and just do something simple to get it done.   It’s not my best work, but not my worst, either.  Front cover:

tagbook1

Most products used are from Tim Holtz, but I’ve also listed others used.

Front Cover:  Simple Stories (Simple Vintage Halloween) & Echo Park (Bewitched) DP on all pages; Graphic 45 Black Large Tags; Stampendous Frantage Embossing Kit (purple)

Tim Holtz:  Mixed Media thinlits, Halloween; Witchcraft die set; Metallic Kraft-Core; Small Tattered Florals; Crinkle Ribbon; Carved Pumpkin, Ripe Persimmon DI; Halloween Quote Chip; Ranger silver embossing powder

Typically, I prefer a spooky or creepy look for Halloween, not cute, but sometimes it’s nice to change things up.  I adhered my tags together with washi tape, then covered everything with the paper.  On the front, I cut the flourish pattern out of black cardstock as a background for the witch and cat and then embossed purple glitter to give it a little sparkle.  Directly under them is a piece of the designer paper I bought and colored orange.  The witch and cat were originally cut from purple Kraft-core paper, but they didn’t show up enough so I cut another set out with silver Metallic Kraft-core.  I decided to add a little bit of bling for the eyes.  The flowers were made from the patterned paper and embossed around the edges with silver embossing powder.  A ribbon, cat charm from my stash, and Halloween quote chip completes the page.

tagbook2tagbook6

tagbook10


Inside:

tagbook3

Products used:  Prima wax (Brushed Iron); 
Tim Holtz: 3-D Impresslits (Scalloped) Mixed Media thinlits, Halloween; Picket Fence Distress crayon; Vintage Spirits thinlits; Halloween Ephemera; Trick or Treat thinlits; Halloween thinlits; Rosette embossing folder; number tokens

Back Cover:

tagbook7

Products used:  Spellbinders Oppulent Ovals

Tim Holtz:  Halloween Ephemera;  Haunted House thinlits; Kraft-Core paper; Bigz Planks; Walnut Stain, Vintage Photo, Ground Espresso DI; Black Soot & Picket Fence Distress crayons

tagbook9

That’s it – thanks for stopping by!

Linking up to:

https://www.simonsaysstampblog.com/blog/stamptember-exclusive-limited-edition-tim-holtz/?utm_source=Simon+Says+Stamp+Blog+Subscribers&utm_campaign=8d865f7ae6-Daily_Blog_Posts&utm_medium=email&utm_term=0_c7e07ef51d-8d865f7ae6-247282725&ct=t(Daily_Blog_Posts12_30_2014)&mc_cid=8d865f7ae6&mc_eid=4dda8a6489